- A+
甲骨文 ARM,大家都用了有阵子了,总结起来就是两个字“真香”,不过日本和韩国因为涌入的mjj太多,线路已经不堪重负。特别是韩国区,线路boom已经是常态了。
因为一机难求,所以大家都用上了脚本,又因为用脚本的人太多,有很多刷机的童鞋收到了警告的邮件,这就很矛盾了,如果你不刷,是肯定抢不到机器的,但是刷了,又怕被警告,进而有封号的风险。唯一比较稳妥的方法就是你把时间调整的稍微长一点,这样可能会好点。不过也有的mjj逆向思维,大家都不敢刷,我依然逆风而行继续刷,所以很开森的抢到了arm。
这篇文章就来继续分享一个利用宝塔搭建的甲骨文 ARM 刷机脚本!
一、生成main.tf
1、创建实例,创建的时候我们选择系统:ubuntu20(不能选带后缀的精简版),VM.Standard.A1.Flex:4C 24G,硬盘:100G,并粘贴密匙。这个过程跟我们正常创建实例是一样。
在所有信息都填写完毕后,选择 另存为堆栈 。堆栈信息、配置变量,全都默认;复查,选中下方的“运行”。最后点击创建,堆栈会自动运行一次。

2、我们点击下载 Terraform 配置,会得到一个压缩包。解压后,会有main.tf,用记事本打开,里面的信息就是我们后面需要用到的。
二、查找并复制租户和用户的ocid
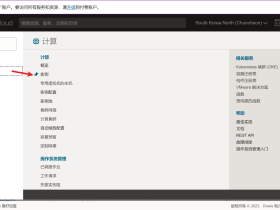
甲骨文后台右上角>>用户设置>>分别点击用户和租户,在信息栏中有我们需要的ID,分别点击复制,可以保存在记事本备份好。具体看图:

三、安装oci命令行管理工具
bash -c "$(curl –L https://raw.githubusercontent.com/oracle/oci-cli/master/scripts/install/install.sh)"一路回车即可,默认安装在/root/bin目录。
当出现“===> Modify profile to update your $PATH and enable shell/tab completion now? (Y/n):”这个时候,是在提示你输入y回车,会自动帮你添加环境变量。之后又是一路回车,出现如下提示表示安装成功。
===> Modify profile to update your $PATH and enable shell/tab completion now? (Y/n): y

===> Enter a path to an rc file to update (file will be created if it does not exist) (leave blank to use '/root/.bashrc'):
-- Backed up '/root/.bashrc' to '/root/.bashrc.backup'
-- Tab completion set up complete.
-- If tab completion is not activated, verify that '/root/.bashrc' is sourced by your shell.
--
-- ** Run `exec -l $SHELL` to restart your shell. **
--
-- Installation successful.
-- Run the CLI with /root/bin/oci --help
使用下面命令查看安装是否成功
oci -v如果返回信息显示没有找到 oci ,那是因为安装后,变量不会立即反映出来,所以我们重新加载一下
exec -l $SHELL然后再次检查,即可显示正确版本号。
四、配置cli
1、输入如下代码开始配置,配置的路径默认在root目录
oci setup config2、具体配置看下面
Enter a location for your config [/root/.oci/config]:
Enter a user OCID:  #输入你的用户ocid
Enter a tenancy OCID:  #输入你租户的用户id
Enter a region by index or name(e.g.
1: ap-chiyoda-1, 2: ap-chuncheon-1, 3: ap-hyderabad-1, 4: ap-melbourne-1, 5: ap-mumbai-1,
6: ap-osaka-1, 7: ap-seoul-1, 8: ap-sydney-1, 9: ap-tokyo-1, 10: ca-montreal-1,
11: ca-toronto-1, 12: eu-amsterdam-1, 13: eu-frankfurt-1, 14: eu-zurich-1, 15: me-dubai-1,
16: me-jeddah-1, 17: sa-santiago-1, 18: sa-saopaulo-1, 19: uk-cardiff-1, 20: uk-gov-cardiff-1,
21: uk-gov-london-1, 22: uk-london-1, 23: us-ashburn-1, 24: us-gov-ashburn-1, 25: us-gov-chicago-1,
26: us-gov-phoenix-1, 27: us-langley-1, 28: us-luke-1, 29: us-phoenix-1, 30: us-sanjose-1): #这里选择区域

Do you want to generate a new API Signing RSA key pair? (If you decline you will be asked to supply the path to an existing key.) [Y/n]: y #输入y
Enter a directory for your keys to be created [/root/.oci]:
Enter a name for your key [oci_api_key]:
Public key written to: /root/.oci/oci_api_key_public.pem
Enter a passphrase for your private key (empty for no passphrase):
Private key written to: /root/.oci/oci_api_key.pem
Fingerprint:
Config written to /root/.oci/config

If you haven't already uploaded your API Signing public key through the
 console, follow the instructions on the page linked below in the section

 'How to upload the public key':

 https://docs.cloud.oracle.com/Content/API/Concepts/apisigningkey.htm#How2
3、复制生成的公钥
cat /root/.oci/oci_api_key_public.pem4、把展示出来的内容复制下来。并且添加到,甲骨文后台=>用户设置>>资源>>API秘钥>>添加API秘钥
5、检查oci配置是否正确
oci iam availability-domain list如果这样提示表示配置正确,如果不是,检查你前面的配置
[[email protected] ~]# oci iam availability-domain list
{
"data": [
{
"compartment-id": "ocid1.tenancy.oc1..aaaaaaaauoxxxxxxxxxxxxx",
"id": "ocid1.availabilitydomain.oc1..aaaaaaaaaixxxxxxxxxxxxx",
"name": "uffff:AP-TOKYO-1-AD-1"
}
]
}
五、用oci申请开通ARM
1、运行命令的脚本如下:
oci compute instance launch --availability-domain yxrF:AP-TOKYO-1-AD-1 --image-id ocid1.image.oc1.ap-seoul-1.aaaaaaaa..... --subnet-id ocid1.subnet.oc1.ap-seoul-1.aaaaaaaa..... --shape VM.Standard.A1.Flex --assign-public-ip true --metadata '{"ssh_authorized_keys": "ssh-rsa xxxxxxxxxxxxxxxxx填你自己的"}' --compartment-id ocid1.tenancy.oc1..aaaaaaaa...... --shape-config '{"ocpus":4,"memory_in_gbs":24,"boot_volume_size_in_gbs":100}'具体的解释如下:
- availabilityDomain:可用性域 我的是日本(yxrF:AP-TOKYO-1-AD-1)
- compartmentId:tenancyOCID
- assignPublicIp:公网IP true
- subnetId:子网
- displayName:实例名,根据自己的main.tf里面的信息填写。
- ssh_authorized_keys :秘钥,需要填写你自己的
- shape 实例配置 ARM:”VM.Standard.A1.Flex”
- shape-config:机器配置
- imageId: “ocid1.iAP-TOKYO-1-AD-11.aaaaaaaar……….”
上面这些信息,我们在第一步生成的main.tf中全部可以找到。
2、先试运行一次脚本,以上的修改好后,全部复制回车运行,显示如下提示表示配置正确。
3、先将一长串的oci命令写到/root/oracle.sh中,如果是用的宝塔那么直接在目录下面新建一个oracle.sh,然后复制那一串代码粘贴保存即可。
4、宝塔计划任务设置执行:
- 执行周期:2-3分钟一次(设置的时间越短,可能越容易触发警告,但设置的时间过长,会不容易刷到。这个自己把握!)
- 脚本内容:bash /root/oracle.sh
执行效果,可以查看日志。
我们现在要做的就是等待好运降临了!
- 我的微信
- 这是我的微信扫一扫
-


- 我的微信公众号
- 我的微信公众号扫一扫
-